DNMLinks Guide: Installing and using PGP on Windows
A comprehensive guide on how to install GPG4Win, create your own PGP public key, send encrypted messages, and decrypt received messages on Windows.
Installing GPG4Win
First, download Gpg4win from [GPG4Win](https://www.gpg4win.org/index.html) and run the installer. You will be asked to choose what additional components to install; ensure the following is selected (as they are by default):
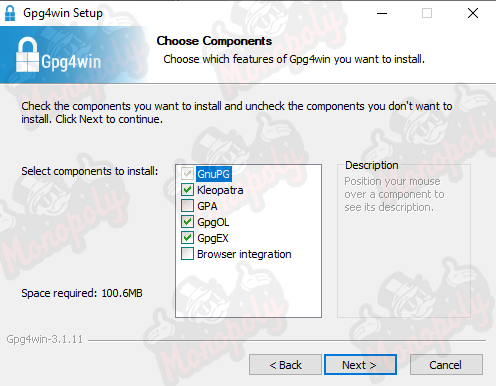
The installation should only take a minute or so. Once completed, you will notice a program called Kleopatra has been installed. This is the GUI in which you will handle all of your PGP tasks. You may notice an icon in your taskbar, which is a lady with a red wig.
Creating Your Own PGP Public Key
Open Kleopatra and click on 'New Key Pair'. A window will pop up asking you to choose a format; simply click on 'Create a personal OpenPGP key pair'.
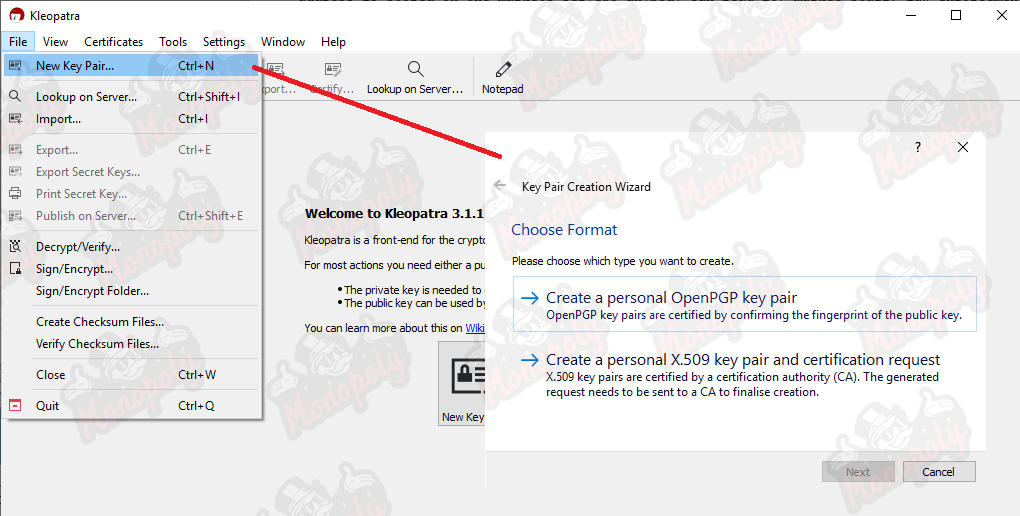
Enter a fake name or an anonymous online alias (e.g., 'anon anon'). You must use both a first and last name. You can optionally enter a fake email or leave it blank. Ensure you use a relatable name, as vendors will need to find you within their list of contacts.
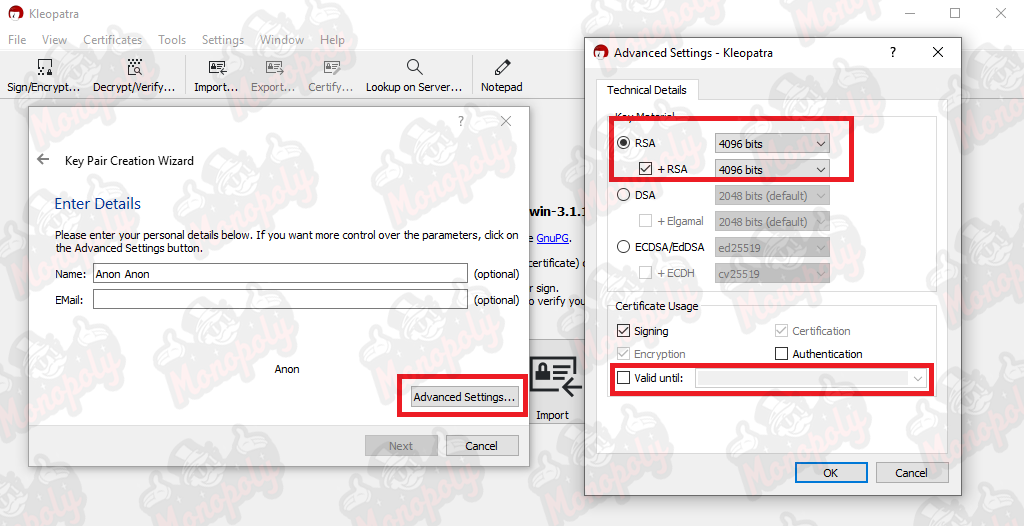
Do not click next just yet; click on 'Advanced settings' and set the key to 4096 bits. Uncheck the 'Valid until' box as we do not want our key to expire.
Click 'OK', and then 'Next'. You will be asked for a password, which will be required to perform actions using your key, so be sure you do not forget it. After a few minutes, you will have your own PGP public key ready for use, displayed in bold within your list of contacts.
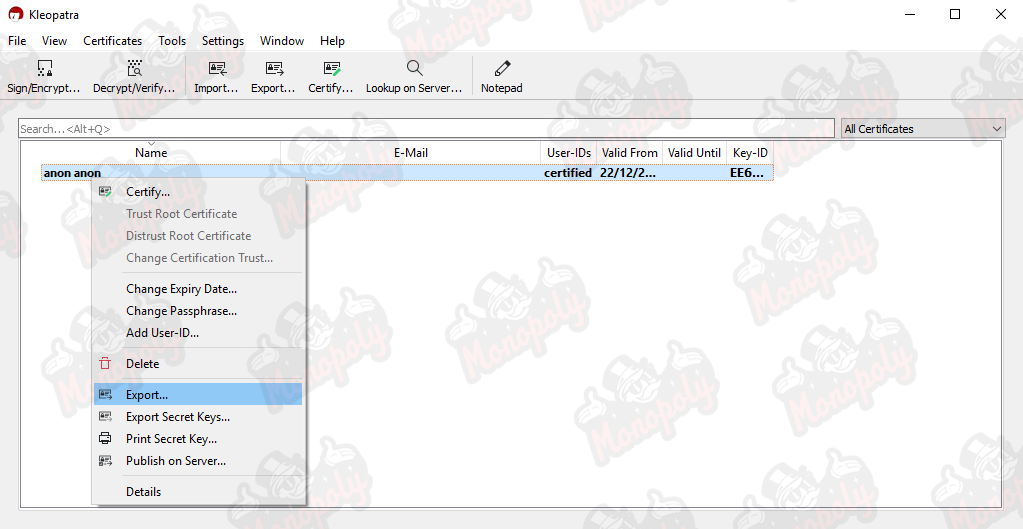
To export your PGP public key, simply right-click, press 'Export', and save the file. If you open the file in Notepad, you will see a long string of random characters. As long as you see 'PGP PUBLIC KEY' at the top between '-----', you can share this publicly.
Sending a PGP Encrypted Message
To send your first encrypted message, you need to obtain the public key of the individual you wish to communicate with (e.g., a vendor). On the order page, copy the public key to your clipboard.

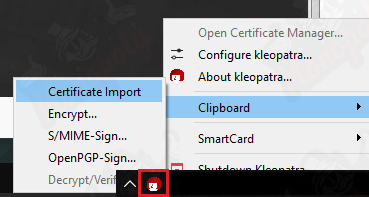
Once their key is in your clipboard, right-click the Kleopatra icon located in your taskbar (the lady with a red wig) and select 'Certificate Import'.
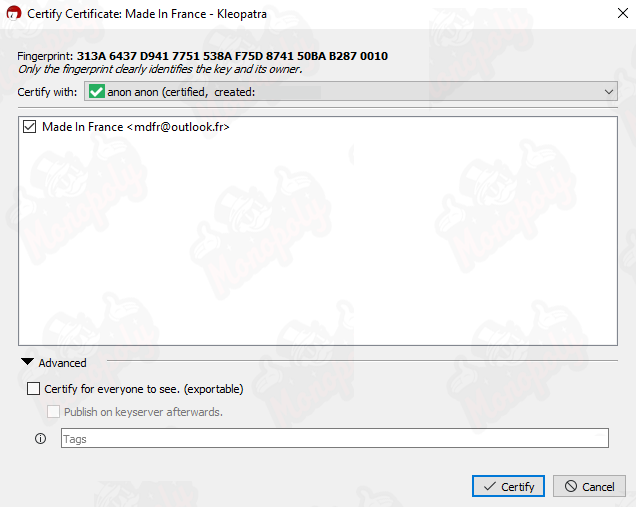
On the next screen, ensure the checkbox is selected and click 'Certify'.
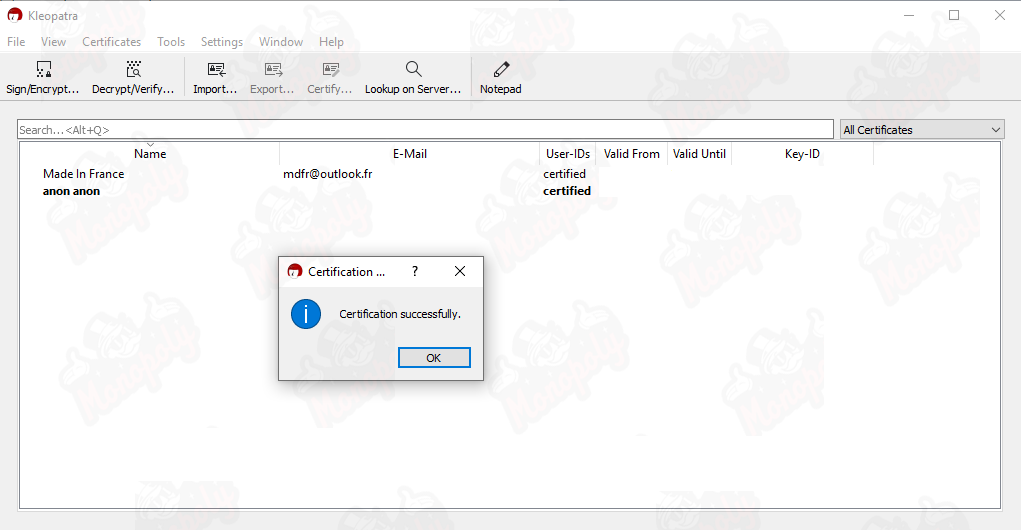
If everything worked out, you will see a window stating the certificate was imported successfully.
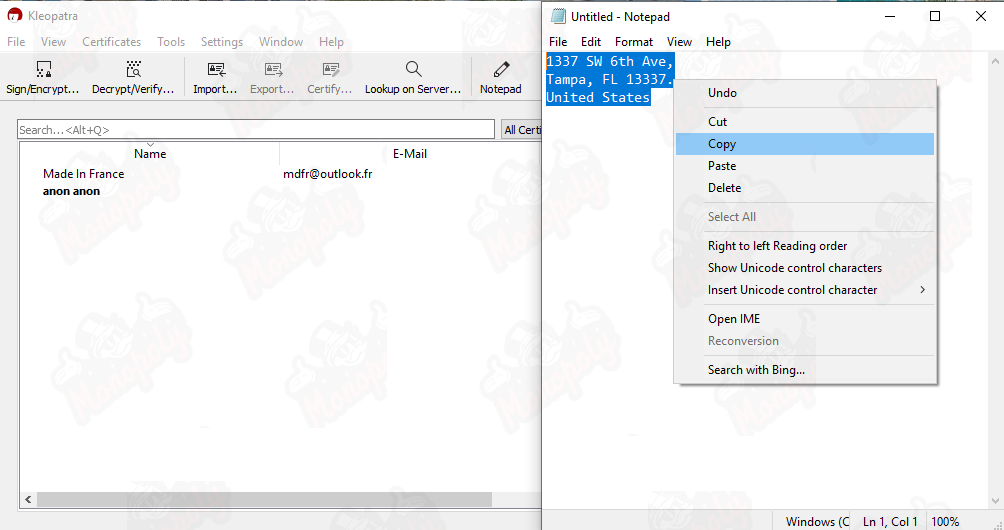
Now, prepare your message (e.g., your address). Open a fresh Notepad document, type in your correctly formatted address and any additional information. Once done, copy the entire message to your clipboard.
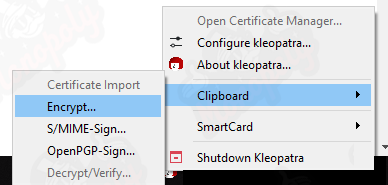
Head back to the Kleopatra icon in the taskbar, right-click the icon, select 'Clipboard', and then finally 'Encrypt'.
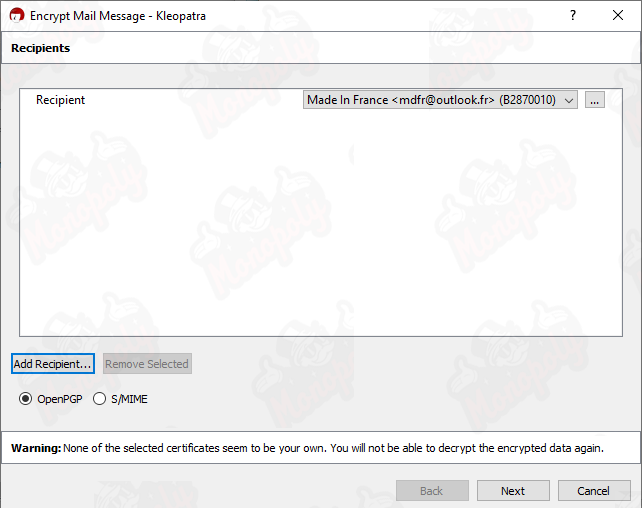
Select the recipient you intend to send the message to. Since you imported their public key, they will be somewhere in your list. Please note that if you use a Live OS and have no persistent storage configured, you will need to re-import contacts each time you restart your computer or virtual machine. Once your recipient has been selected, click 'Next'.
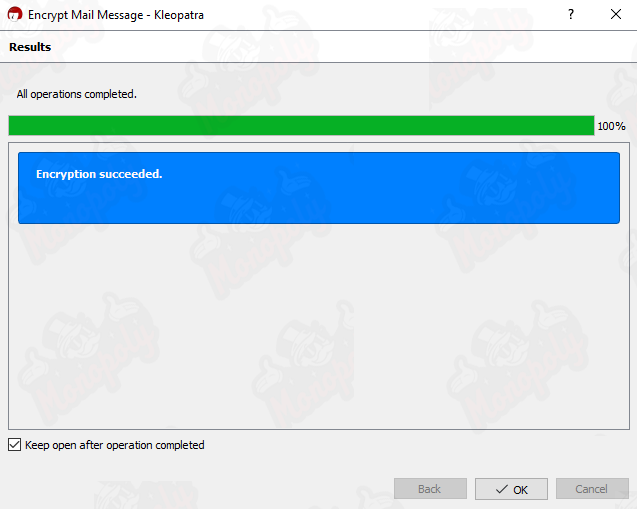
If all is well, you will see a screen stating that the encryption succeeded. Great!
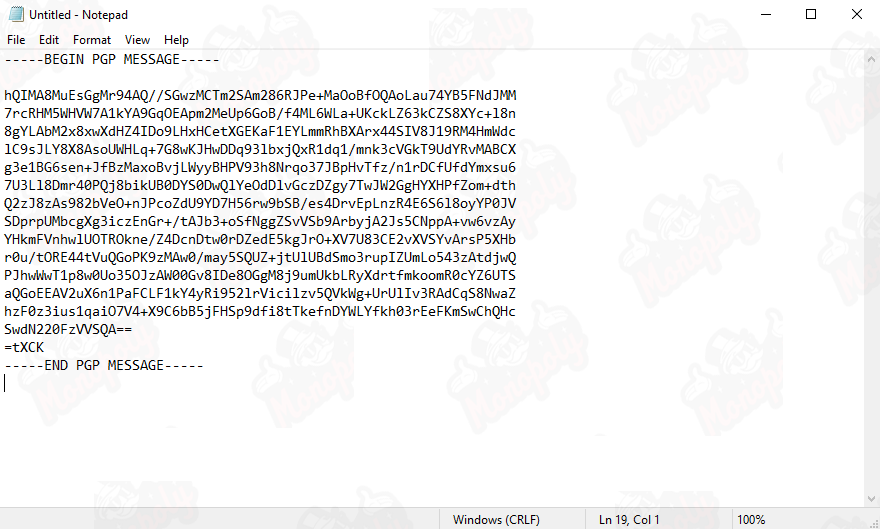
Now all you need to do is go back into a fresh Notepad, click 'Paste', and your encrypted message is ready to be sent to the vendor.
Decrypting a PGP Encrypted Message
Copy the message you want to decrypt. Then, in your system tray, right-click on the Kleopatra icon, go to 'Clipboard', and select 'Decrypt / Verify'. When prompted, enter your PGP key password, and the decrypted message will be copied to your clipboard.
Best Practices for Using GPG4Win
- Always use a strong, unique password for your PGP key.
- Regularly back up your PGP keys and store them in a secure location.
- Verify the public keys of individuals you communicate with to prevent man-in-the-middle attacks.
- Keep your GPG4Win software updated to protect against vulnerabilities.
- Consider using a dedicated device for sensitive communications.
Conclusion
Using GPG4Win on Windows provides a straightforward way to manage PGP keys and encrypt messages. By following the steps outlined in this guide, you can create your own PGP public key, send and receive encrypted messages, and ensure that your communications remain private and secure. Always prioritize security and stay informed about best practices.
Table of Contents
Related Articles
DNMLinks Guide: How to Buy Bitcoin & Withdraw to Electrum Wallet
Learn how to buy Bitcoin in different regions of the world, and securely withdraw Bitcoin to your Electrum wallet.
Read ArticleDNMLinks Guide: How to Install Electrum Bitcoin Wallet
Learn how to install Electrum, a secure and lightweight Bitcoin wallet, on Windows, macOS, and Linux.
Read ArticleDNMLinks Guide: How to Install Feather Wallet (Monero)
Learn how to install Feather Wallet, a privacy-focused Monero (XMR) wallet, on Windows, macOS, and Linux.
Read ArticleSecurity Tips
Essential security practices to stay safe when browsing darknet markets.
View Tips